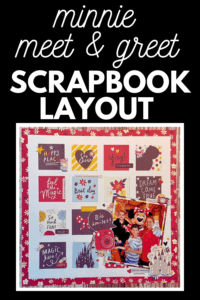
Mama’s Little Boy Grid Design Scrapbook Page
A grid-designed scrapbook page is easy to make and always turns out great. This is a great style for all levels of scrapbooking experience. Here I’ve used up some (very old) paper I had in my stash to create a page about my little boy.
I used the Fine & Dandy Collection by My Minds Eye to create this page.
I have seriously been hoarding this collection for (not kidding) 10 years. I just love this collection. It’s perfect for boys!
Lately, I’ve been on something of a mission to finally use up some of these beautiful papers that I’ve been holding onto, and I knew right away that this would be one to finally put to use.
This is a huge collection with twelve different patterned papers. Each side is as cute as the reverse. I also used the layered stickers, the true blue banner stickers, and the true blue chipboard stickers.
Here is a blog post from My Minds Eye with all the products that were available in this collection if you’d like to check it out.

This post may contain affiliate links. This means if you click through and buy, we may earn a small commission. (At no cost to you.) Please see our full disclosure for more details.
What You Need To Make This Page
Since this is an old collection the chances of you having this paper or being able to find it for sale are going to be small. So instead go into your stash (or buy something new!)
You’ll need:
- 2 sheets of cardstock paper – 1 white for the base & 1 coordinating colour for a photo mat. I’ve used a burnt orange cardstock from Bazzill that matched my patterned paper.
- 10 different patterned papers – This is a great way to use up scraps or leftover pages of double-sided patterned paper. You really only need 5 sheets of double-sided paper. And of course, you could use less paper and instead repeat the patterns.
- Chipboard stickers and a set of small number stickers
- Small decorative empherma such as stars and dots.
How To Make This Grid Design Scrapbook Page
Start With Your Cuts
- Cut 9 squares from your various patterned pieces of paper at 3.25 inches.
- And again, cut 9 squares of patterned paper, this time at 3 inches.
- Cut one of your patterned papers to 4.25 inches by 6.25 inches for the first photo mat.
- Cut coloured cardstock to 4.5 inches by 6.5 inches for the second photo mat.
- To replicate the cardstock sticker to the left of the picture, cut a piece of notebook paper 2.5 inches by 4.5 inches. Punch six holes down the left side and decorate with stickers.

Place Down Your Squares
Start with your white cardstock base. Using a ruler and pencil draw a square at 11 inches. This will be your rough guide for sticking down your squares.
I am okay with things not being perfect, so this works for me, but if you like to make sure things are lined up exactly, you may want to be a bit more exact with your math and spacing.
Decide which squares you want to layer and stick them together with the smaller square on top of the larger.
Lay them out onto the cardstock and decide how you want to space them.
Once you’ve got them lined up, it’s time to start sticking the squares down. I find a t-ruler super helpful to make sure that they are straight.

Are you looking for some ideas for what to title your scrapbook pages? You might be interested in our Scrapbook Page Titles page. Check it out –> HERE
Add Your Photo & Embellish
Now that all your squares are placed down it’s time to add embellishments and your photo.
Place your 4×6 photo onto the patterned paper mat (4.25 inches x 6.25 inches) and then place it onto the cardstock mat (4.5 inches x 6.5 inches).
I decided to give my photo some lift and dimension. To do this I put a layer of craft foam between the two photo mats as well as the biggest photo mat and the page.
Once your photo is stuck down it’s time to embellish your page to your liking. Use foam tape or squares to pop up elements for more interest and dimension.
Add your final touches and you are done!

Are you looking for more page ideas? Visit our Scrapbook Page Layouts –> HERE