Making Memories With Mickey At Aulani | Scrapbook Layout
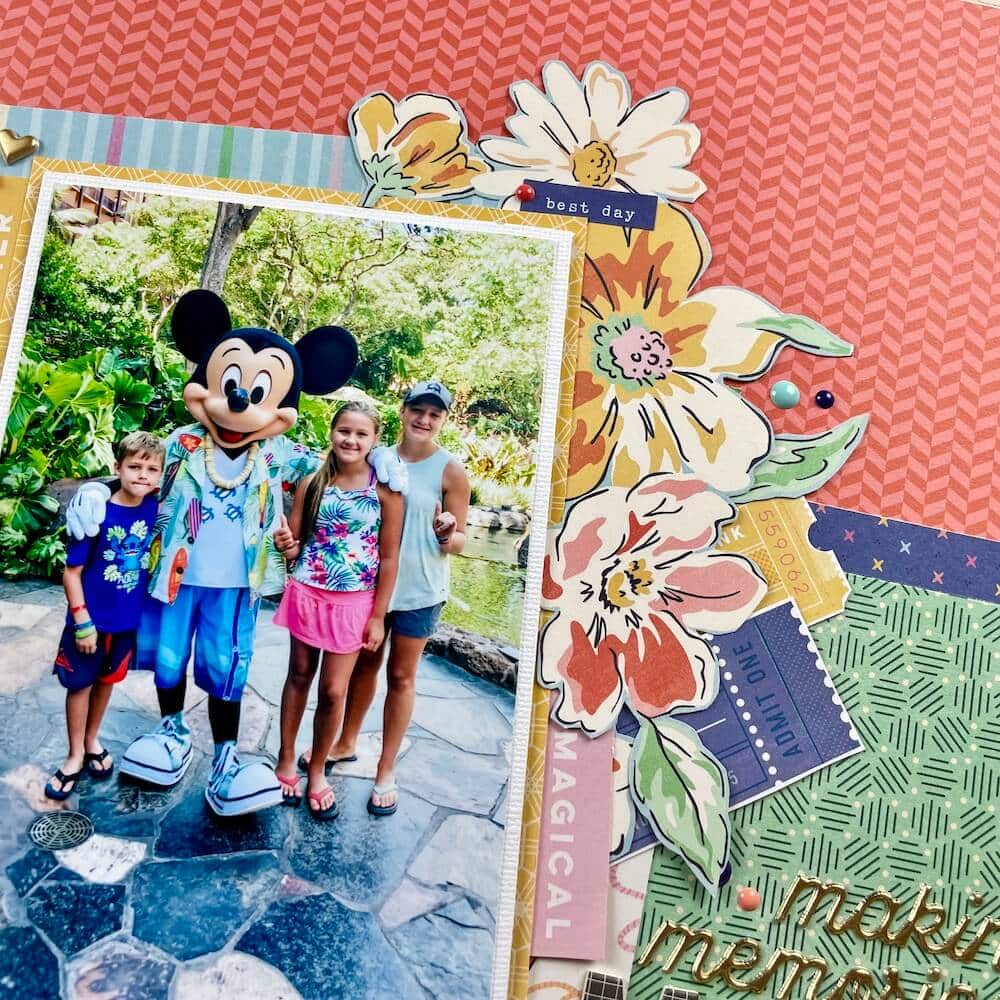
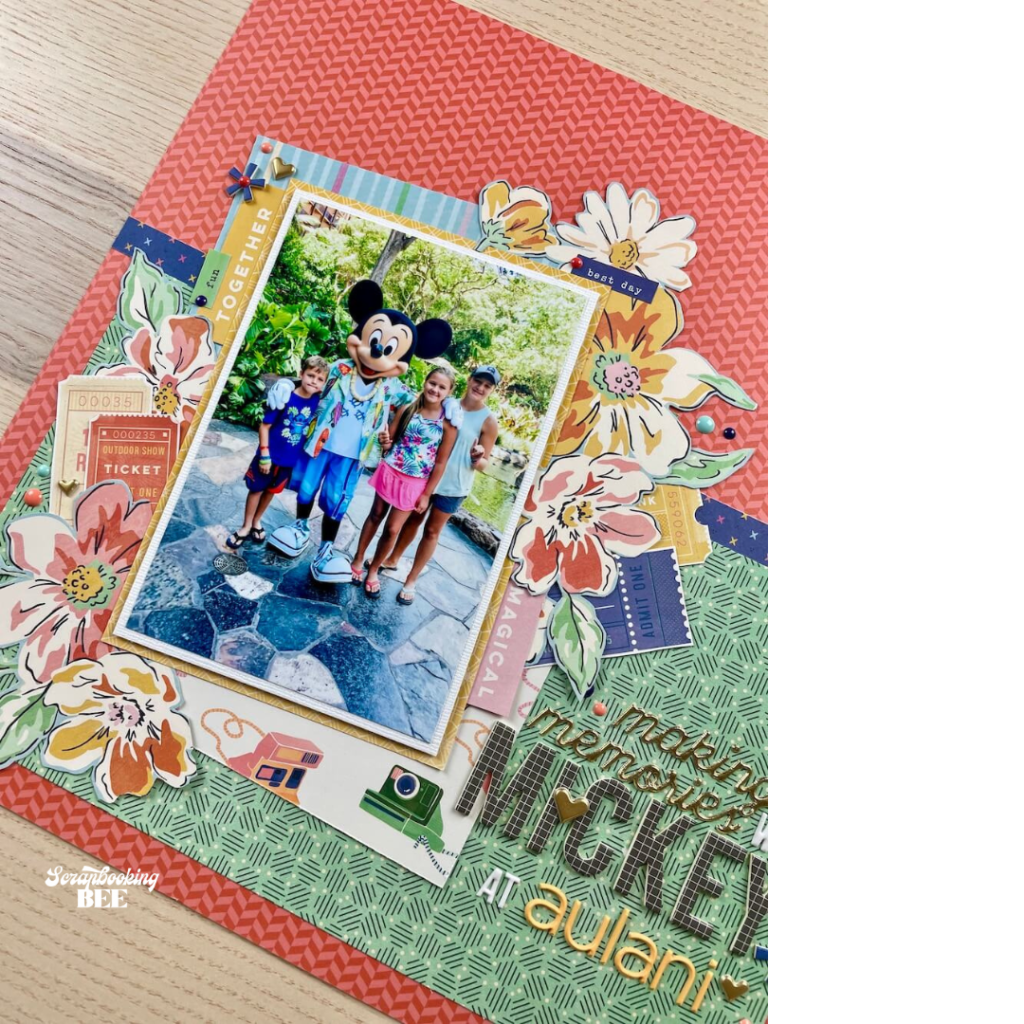
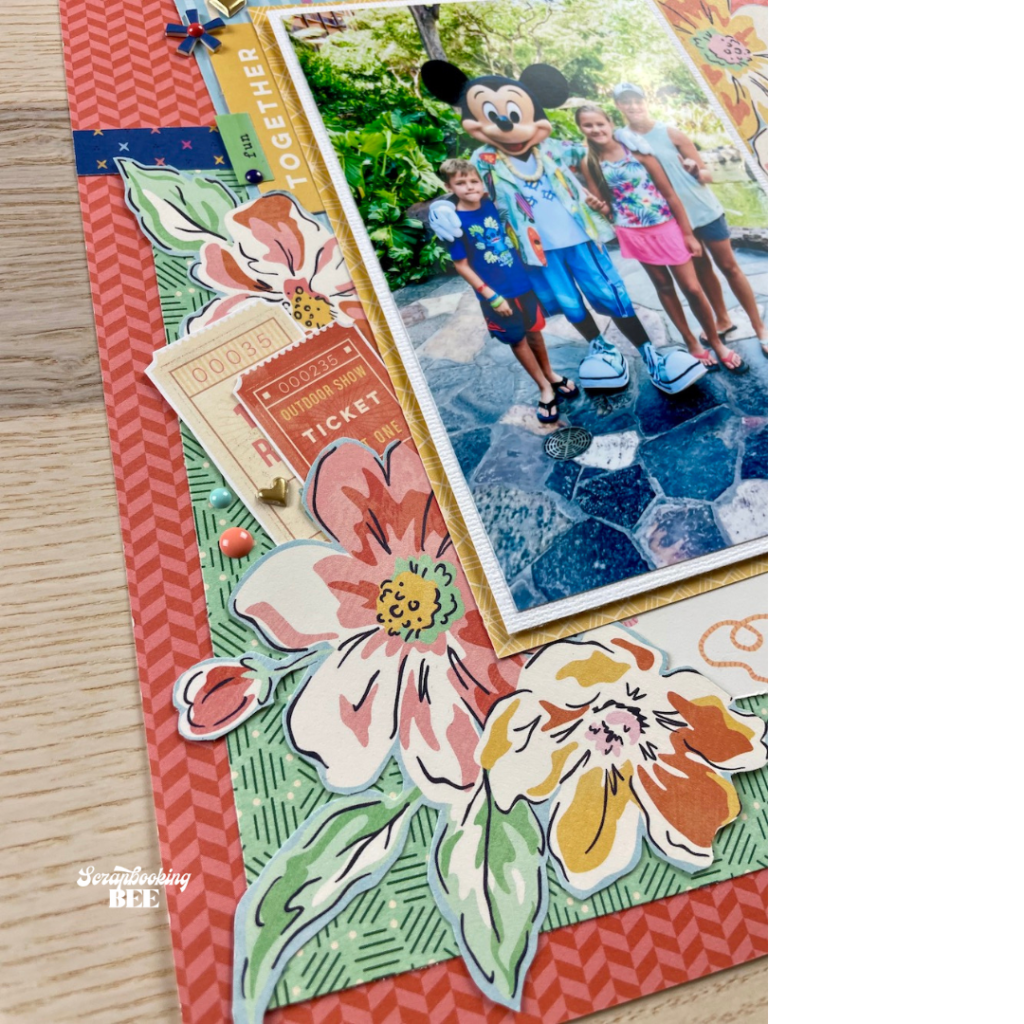
I love this sweet picture of my kids with Mickey Mouse at Aulani in Hawaii. This was such a fantastic holiday. Our kids love all things Disney and Aulani was an amazing experience for them.
When it came time to scrapbook our vacation, I knew that the standard Disney “colours” weren’t the right fit for our Hawaiian vacation. I chose the She’d Magic collection by Dear Lizzy to make this page. I love the bright colours and the pretty patterns.

This post may contain affiliate links. This means if you click through and buy, we may earn a small commission. (At no cost to you.) Please see our full disclosure for more details.
Unfortunately, the She’s Magic collection is now quite hard to find as it was released several years ago, and yes I have been hoarding it since I purchased it several years ago. Hopefully, you have some luck finding it! It is such a beautiful collection.
Products Used
- Dear Lizzy-She’s Magic – Round Trip x 2
- Dear Lizzy- She’s Magic – Real Life x 1
- Dear Lizzy- She’s Magic – Magic x 2
- Dear Lizzy- She’s Magic – You Totally Can
- Dear Lizzy- She’s Magic – Sincerely Yours
- Bazzill – White Cardstock
- 4 x 6 Photo
- Felicity Jane- Mollie Alphabet Stickers
- Felicity Jane –Ginny White Alphabet Stickers
- Felicity Jane – Julia Yellow Alphabet Stickers
- Jen Hadfield- The Avenue Thickers
- Dear Lizzy- She’s Magic Confetti Stickers
- Echo Park- Summertime Enamel Dots
- Elle’s Studio – Asterisks Embellishments

Cutting Instructions
- Green paper (Magic) – 11″ x 9.5″
- The blue strip above the green is the branding strip from the Round Trip paper. It measures 12″ x 1/2″
- Blue stripe (Real Life) – 5.5″ x 4″
- Cameras (Real Life) – 4″ x 6″
- Yellow (Sincerely Yours) photo mat – 6.5″ x 4.5″
- White Cardstock – 6.25″ x 4.25″
- The “together” & “magical” embellishments from the You Totally Can paper from the She’s Magic collection.
- I fussy cut the flowers from magic and the tickets from the round trip paper.

Assembly Tips
- Use a piece of craft foam underneath the white photo mat to give your photo some dimension.
- Group embellishments into groups of 3 or 5 for an eye-pleasing look.
- Use foam adhesive to give your embellishments dimension.
- Use a t-ruler to make sure your title is straight. (I clearly didn’t, lol)
