The 10 Tools You Need To Get Started Scrapbooking
Do you want to get started scrapbooking but are not sure where to start? When you first start shopping around for scrapbooking supplies, it can be overwhelming. There are soooo many products and tools available. It may make you want to turn around, run away and forget about scrapbooking altogether.
What supplies do you need to get started scrapbooking?
There are ten essential items that will help you get started creating beautiful scrapbooks. You don’t need much to scrapbook, and a lot will depend on your taste. Start with papers you love, have a variety of cardstock (a basic heavier weight paper and coordinating patterned papers. The second thing that you’ll need is an album with page protectors. A must-have item is adhesive. Next is cutting tools. Scissors, a craft knife and a paper trimmer are essential. You’ll want a small selection of pens for writing down all those special memories. Add something special to your pages with stickers and embellishments. Next, you’ll need an alphabet to personalize the page. There are a couple of other tools that will come in handy like a hole punch and corner rounder. The last item on the list is tools to help you stay organized.
Scrapbooking is a hobby where everyone develops their own personal style. You can keep it simple or create pages that are much more extravagant. After a little time and practice, you’ll find your style and what works for you. The key is only to buy things that you love and know you have a purpose.

This post may contain affiliate links. This means if you click through and buy, we may earn a small commission. (At no cost to you.) Please see our full disclosure for more details.
1. Cardstock Paper

Cardstock paper is a staple for scrapbooking. It’s something you’ll likely use each time you scrapbook.
What is cardstock? Cardstock paper is heavier than regular printer paper. It typically ranges from 60 lb to 110 lbs. A sheet of cardstock weighs about 135 to 300 g/m2 while a regular sheet of printer paper weighs approximately 4.5 g (from Wikipedia) Most cardstock you’ll find for scrapbooking is 80 lb.
Cardstock is your basic coloured paper that is often used as a base or to mat photos. It also helps break up the busy-ness of patterned paper. You will typically find it in two sizes: 12×12 or 8 1/2 by 11.
You can head to your local scrapbooking store to find a large variety of single cardstock sheets. Bazzill Basics cardstock paper is my go-to brand for cardstock. It is high-quality and perfect for scrapbooking.
2. Patterned Scrapbook Paper

Patterned paper is one of the easiest ways to create beautiful and fun scrapbooking pages.
This paper is more lightweight than cardstock but more substantial than a regular sheet of printer paper. It is printed with a “pattern” of some kind. It can be printed with almost anything; stripes, flowers, plaid, paisley, whatever you dream up you can probably find.
It can be hard to decide which to choose; there are so many beautiful papers. Before you start to buy up every paper in sight (been there, done that), try to think of a theme that will compliment your photos. Try to think of what kind of “look” you want your whole album to have.
For example, if you are scrapbooking a trip to Disney maybe you’d like the majority of your paper to highlight those “Disney” colours of red, yellow, black and white.
If you’re scrapbooking a heritage book, you may want to stick to muted and simple colours. This way the papers won’t over-shadow the small, black and white photos.
In the end, it’s your choice, I have albums that do not a theme and I love them just as much at ones that do.
Paper (both patterned and cardstock) can be purchased either one piece at a time or in coordinating paper pads or kits.
Here is an excellent video by Scrapbook.com, showing a few different ways to use patterned paper on your scrapbook pages. (In the video, she talks about die-cuts. A die-cut machine is a tool that allows you to cut all kinds of shapes out of paper (and many other materials) using templates.)
3. Album & Page Protectors

You’ll need a good-quality album to store all your completed pages.
When choosing your first scrapbook album you’ll want to decide what size of album you want. This will determine what size of scrapbook pages you’ll create.
The most common size for a scrapbook is 12 x 12 or 8 1/2 x 11.
Smaller albums are becoming more and more popular each year. These range in sizes but the most common are 8×8, 6×6 or 6×8. There are even albums as small as 4×4 or 4×6.
The two most popular types of albums are the post-bound and three-ring binders style albums.
Or you can go traditional with a spiral-bound scrapbook album (like this one from Amazon)
You might like these 3 Ring Albums:
Want more information on how to pick the right scrapbook album? You might be interested in our post How To Pick Your Scrapbook Album.
Page protectors are plastic sheets that cover and protect your completed scrapbook pages. Unfortunately, page protectors are not standard and vary from one company to the next. When purchasing an album make sure to grab a package or two of page protectors.
(The page protectors below accompany the albums above and can be found on Amazon)
MCS MBI 12×12 Inch Scrapbook Expansion Page Refills (Postbound)
American Crafts 12-Inch by 12-Inch Page Protectors (3 Ring)
We R Memory Keepers 12 x 12 inch 3-Ring Album Page Protectors (3 Ring)
4. Adhesive

There are many adhesives to choose from. Some are meant to be an all-purpose adhesive and others that have a specific purpose.
All-Purpose Adhesives
These adhesives can do it all. Stick down your papers, photos and embellishments, all using the same adhesive.
Adhesives With A Specific Purpose
Glue Dots – These are super sticky little “glue globs” perfect for tacking down embellishments.
3D Foam Squares– Placing one of these underneath one of our embellishments or a cut out of paper will give it dimension and pop it off the page.
Glue Pen– The glue pen is perfect for sticking down small bits especially when other adhesive applications are too large to do the job.
Photo Mounting Corners– use these if you don’t want to permanently stick down your photos or for an “old fashioned” look. They are available in a variety of colours, with clear and black being the most popular.
5. Cutting Tools

When you’re first getting started into scrapbooking there are three cutting tools you’ll want to start with.
- Scissors -pick small sharp scissors such as EK Success Small Scissors
- Craft Knife– a small X-acto style knife for detailed cutting. You may also want to purchase a self-healing cutting mat that will protect your work surface.
- Paper Trimmer – a ruler and paper cutter in one, this is a must-have for all scrapbookers. Make sure your cuts are straight and measurements correct with a good quality Paper Trimmer.
6. Writing Tools

When you are first getting into scrapbooking, don’t feel as if you need to invest in a whole bunch of pens and markers. The most important thing is to buy one or two high-quality pens intended for scrapbooking or journaling.
This way, you can guarantee that the ink won’t damage your pages. I recommend starting with high-quality black pens.
You may notice that the black pens in the picture above are marked 01, 03 and 05. This tells us the thickness of the nib. 01 being the thinnest tip, 03 a medium, and 05 the thickest of the set.
The pens I use and recommend are:
American Crafts Precision Pens
7. Stickers & Embellishments

Now on to the fun stuff!
Stickers are often what come to mind when you think of scrapbook embellishments. There are whole aisles dedicated to them at stores like Michaels or Hobby Lobby.
Stickers are only the beginning. The list of things you can use as an embellishment for your scrapbook pages can go on and on. Here are a few of the most common items used as scrapbook embellishments.
- Die Cut Pieces
- Ribbon & Twine
- Paper Clips
- Rhinestones or Enamel Dots
- Journaling Cards
- Chipboard Pieces
- Flowers
- Staples
- Washi Tape
- Eyelets & Brads
- Pieces of Fabric
7a. Scrapbook Kits
You’ll often find kits that are collections where the stickers and embellishments coordinate with several sheets of patterned paper. These are often referred to as scrapbooking kits or paper packs .
What I love about them is that they are an all-in-one kit that includes patterned paper and a selection of stickers and embellishments. They are great if you don’t have access to a local scrapbook store and want to ensure that you get coordinating items when ordering online.
Some of my favourite scrapbooking kits are made by:
- Simple Stories
- Echo Park
- Carta Bella
- Doodlebug Designs
8. Alphabet

Personalize your pages with a fun and colourful alphabet!
One of the simplest and quickest ways to do this is with letter stickers.
Another fun way to add letters to your page is using alphabet stamps.
Get started with clear acrylic stamps like these. You can easily see what you are doing when since they are clear. For acrylic stamps, you’ll need a clear block on which to stick the stamps. One stamping block can be used multiple times with different acrylic stamps. You’ll also need some stamping ink; black is perfect when beginning.
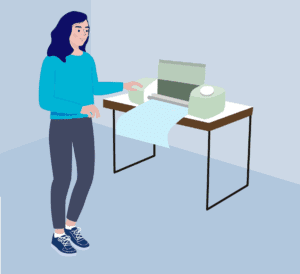
If you are serious about scrapbooking, I’d suggest investing in a Circut Machine eventually. It allows you to program whatever you’d like and cut your design out of many different materials, not just paper.
If you’ve heard of the Cricut before and are interested in learning more, this video by The DIY Mommy is an excellent introduction to what Cricut Machines are all about.
9. Other Tools

Hole Punch- it’s a simple tool that will come in handy when you want to create tags or stick embellishments to your page.
Corner rounder – If you like the look of rounded corners on your paper or photos, you might want a corner rounder. My favourite is the Crop-A-Dile Corner Chomper by We R Memory Keepers.
Ruler– a plain old ruler will be helpful to make sure things are straight, but also a t-ruler comes in super handy when making all kinds of papercrafts.
Paper Punches – you can start with a basic circle, scalloped or square. Pick ones you know you will use over and over again. Here are a few of my go-to punches:
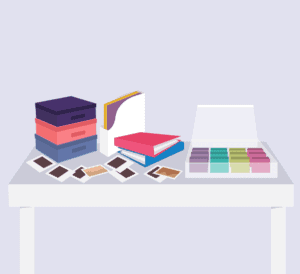
10. Storage For All Your New Stuff

The not-fun part of scrapbooking and crafting (for most people). Organization!
It is so frustrating when you finally have time to sit down to scrapbook to then get overwhelmed by stuff. You end up spending more time looking for something and getting organized than actually crafting. The trick to successful scrapbooking is to have everything organized and ready to go.
Archival Safe and Acid Free
You may come across a few confusing terms while shopping for scrapbooking supplies. The main ones to look for are archival safe, acid-free, paper safe, lignin-free or acid balanced. These are important, although I won’t get into the details about ph levels and acidity, always try to choose archival-safe or acid-free. This could mean the difference between your scrapbooks lasting ten years versus fifty years or more. You might be interested in an article we wrote all about why acid-free is important.
Conclusion
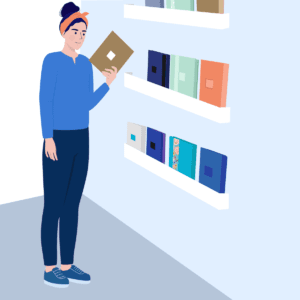
Getting started into scrapbooking can be overwhelming, you walk into your local scrapbooking store and are faced with a wall of albums, paper and adhesive. It’s hard to know where to start. These ten (and a bit) items are all you need to get started making beautiful scrapbooks.
Save It For Later

