Congratulations Card With Yellow Flowers | Altenew AECP
As an avid scrapbooker, I was looking for a bit of a challenge and something different to spark my creativity. I was feeling a bit stagnant and knew that if I could get shaken up a bit, I would feel inspired again. Plus, I’ve always wanted to learn more about stamping and cardmaking, so on a whim, I decided to apply for Altenew’s AECP program, and I’m glad they accepted me!
After the last project that I completed for All About Layering 1, I was hooked, and inspired and quickly completed All About Layering 2.

This post may contain affiliate links. This means if you click through and buy, we may earn a small commission. (At no cost to you.) Please see our full disclosure for more details.
All About Layering 2
All About Layering 2 is also taught by Nicole Picadura on the Altenew Academy and has many similarities to All About Layering 1.
There are ten lessons where she demonstrates several layering stamps sets and shows tips and tricks for how to layer up these stamps beautifully. This class is also free!

Inspiration
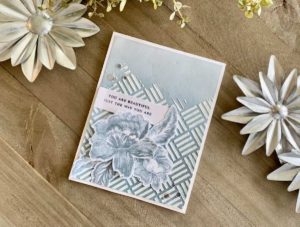
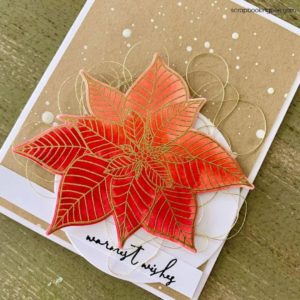
I was inspired by several of the project samples in All About Layering 2. These two popped out to me, and I think they are gorgeous!


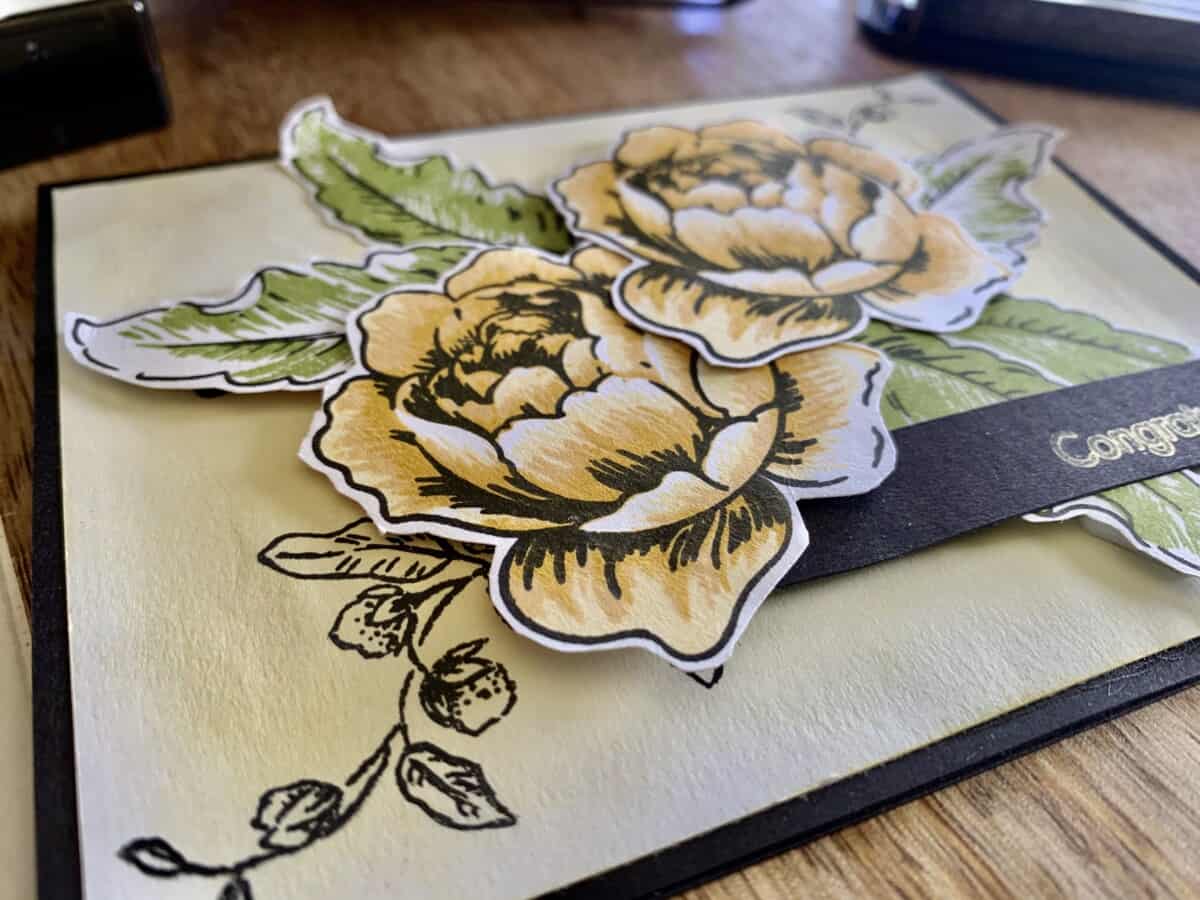
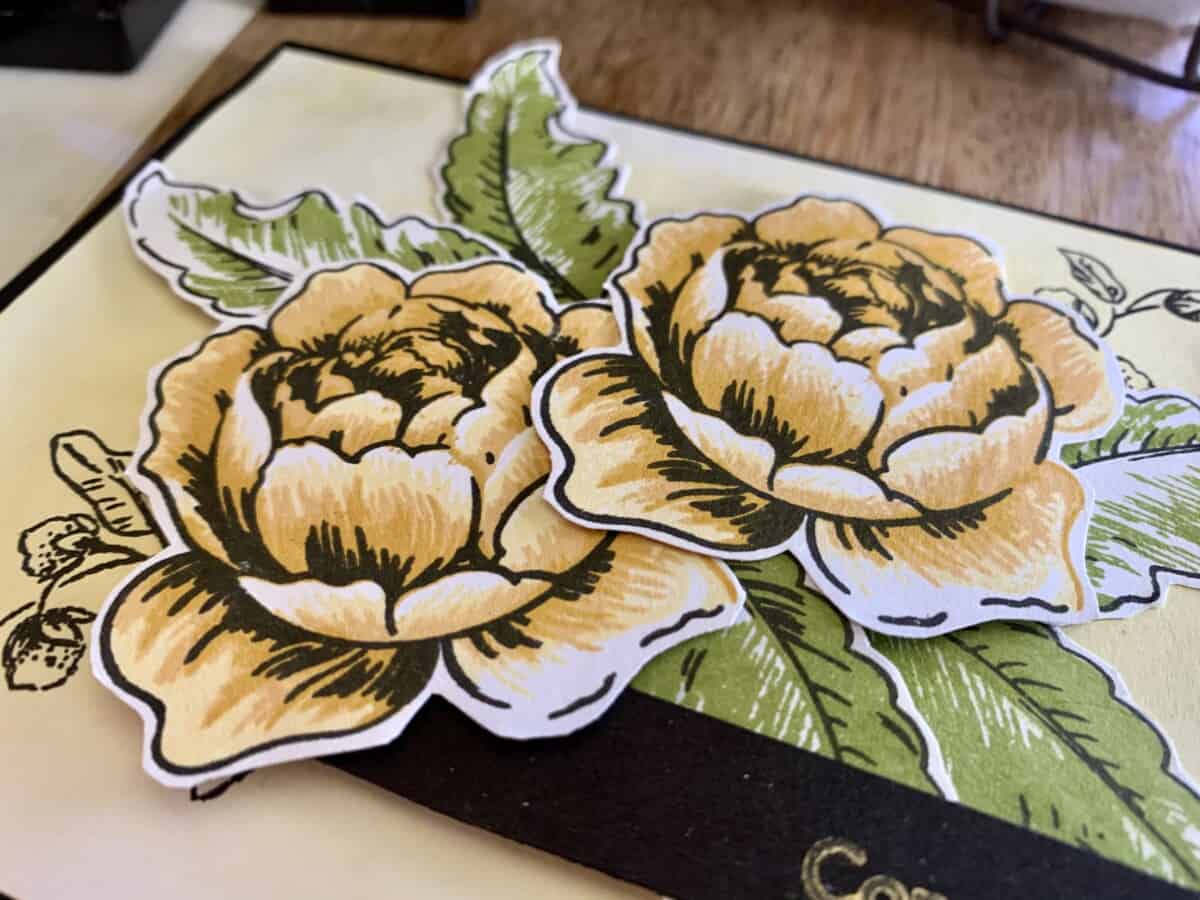
The day I sat down to create this project was so cold. It felt like fall. I thought that it would be fun to use the new yellow coordinating ink set, called Fall Harvest, which I recently purchased from Altenew. This set has four inks; Butternut, Pumpkin Pie, Yellow Ochre and Sicilian Amber. Check it out here.
Instructions
1. Cut a card panel for an A2 size card. 4″ x 5 1/4″ using your favourite white cardstock. I recommend Neenah Solar White #80.
Stamp Out Your Flowers & Leaves
To create this card, I used the Rose Blossom stamp set by Altenew.
I used the large flower layering stamp, the large leaf, and the “vine” to create this card.

2. Stamp out two large flowers with a stamping platform (such as a Misti).
I always stamp out one or two extra; this way, if I make a goof, I have another one ready and don’t have to start over.
For the large flowers, I used the ink colours:
- 1st layer = Obsidian Black Ink
- 2nd layer = Butternut
- 3rd layer = Pumpkin Pie
- 4th layer = Yellow Ochre
3. Stamp out the leaves. For this card, I used five large leaves.
At first, I wasn’t sure what I was going to do with the leaves. A lot of experimentation took place!
I tried embossing them, layering them with different greens, yellows, layering them with green and yellow, and used every green ink I had in my stash.
In the end, only one worked for me; Moss. It complemented the yellow so well.
Once the black outline was stamped, I alternated between the 2nd and 3rd layers for a more varied look since I had decided to use only one green.
For the leaves:
- 1st Layer = Obsidian Black Ink
- Alternate between the 2nd & 3rd layer = Moss
4. Once you’ve finished stamping, cut out each flower and leaf, leaving a small white border.
Create The Background
5. Using an ink blending brush and the ink of your choice ( I used Butternut), start in the centre in a circular motion, slowly moving outwards. I chose to have my ink a bit heavier in the centre and to the top right side, then lighter toward the edges.

5. Stamp the “vine” onto your inked background using Altenew Obsidian Black Ink. It’s perfect for fine details. I used an acrylic block, but a stamp platform would work great.

6. Stamp the sentiment “congratulations’ with gold ink ( I used Brilliance Galaxy Gold) onto a black cardstock strip. 1/2″ wide to approx 3″ long to it can tuck behind the flower.)
Put It All Together
7. Assemble your stamped images onto the background.
- Stick down the bottom flower, top left, and two top leaves with your favourite adhesive tape or glue.
- Use 3D foam adhesive on the top flower, bottom left and bottom right leaf.
- Use foam adhesive squares to attach the sentiment strip.
8. Add a bit of shimmer to the flowers by gently spritzing with a shimmer accent spray.
9. Cut a piece of black cardstock 5 1/2″ x 8 1/2″. Fold in half and mount the card panel.
This project was completed as my submission for All About Layering 2 for Altenew’s AECP Program. For more information on this program click here.